This is a story of how you can fix a big mistake in the beginning of a top down sweater without having to rip back the whole body.
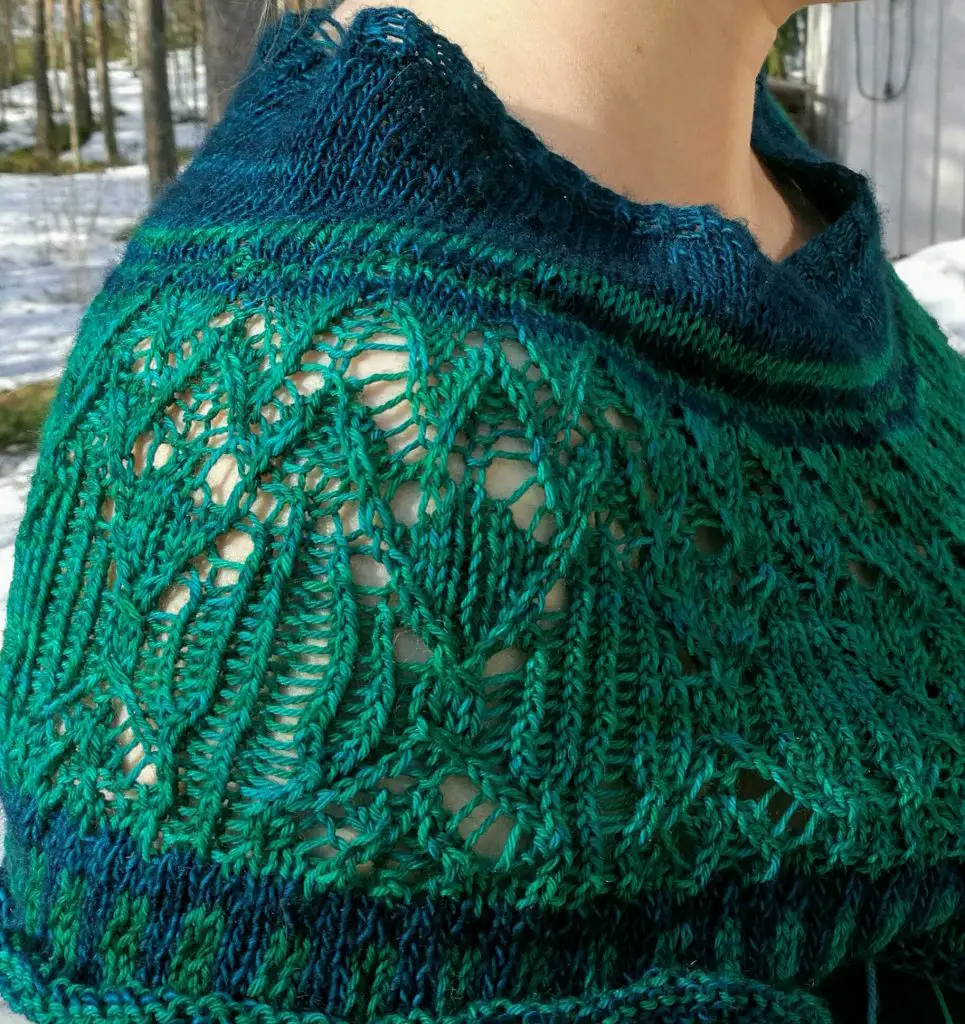
I casted on Zweig sweater last week and after several evenings of work I had finally completed the lace and colorwork and separated the sleeves. I tried the sweater on and noticed that there was something wrong with the yoke (lesson learned: don’t be lazy and try the sweater on more often).
Quite soon I came to the conclusion that the problem was the first colorwork section which was way too tight (a classical beginner mistake). At first I was not too concerned since blocking usually helps and so I blocked the sweater. However, the problem remained and I thought that there is no way I will rip back all the lace.
Because I just recently learned the techniques for kitcheners stitch and afterthought heel I started thinking that maybe it would be possible to cut the sweater into half and then rip back the colorwork, remake it and finally seam the pieces together with kitcheners stitch. Good news, it totally worked! Read below the steps for fixing the yoke.
1. Pick up the stitches
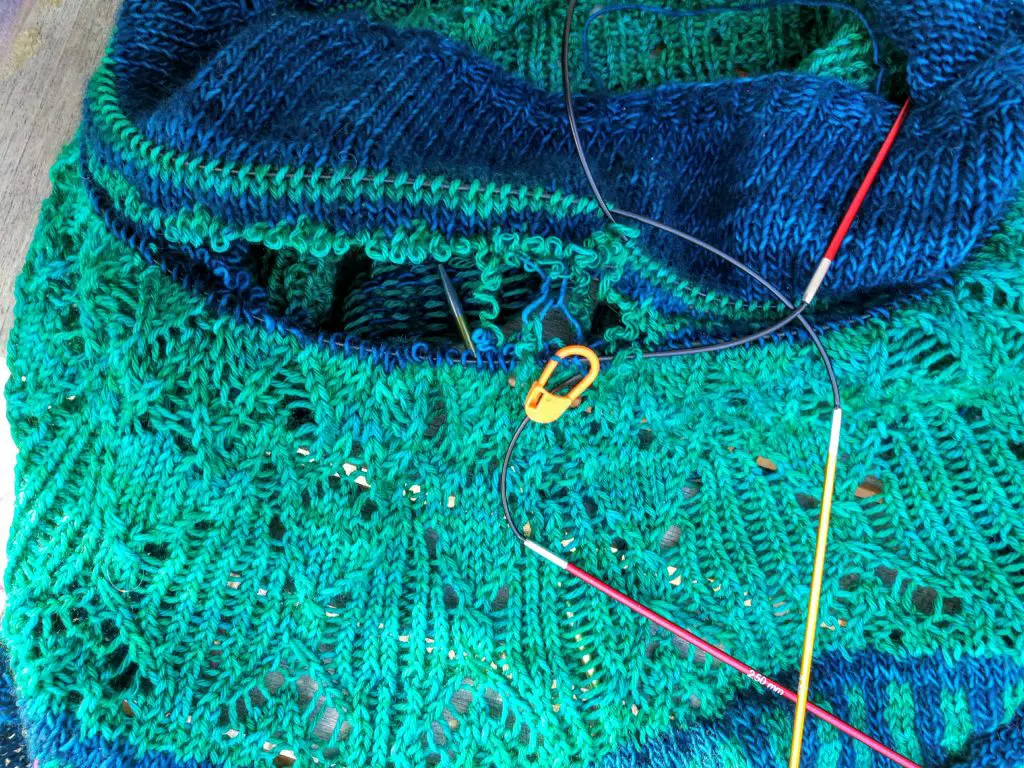
First I used two long circular needles for picking up the stitches below and above the colorwork section that I wanted to remake. Check out this youtube video for detailed instructions of how to do it. I chose rows where the next row was of different color. That made it easier to spot the stitches. Before proceeding I calculated the stitches to make sure that the number of stitches matched the pattern.
2. Unravel the colorwork
Up next came the scary part where I had to cut one stitch between the cables and start to unravel. I had stitch markers nearby in case I had not done picking up the stitches correctly and needed to save a dropped stitch. This part went actually quite smoothly and there were no dropped stitches.
3. Remake the colorwork and seam the pieces together
Then I took the upper part of the sweater and knitted the few rows of colorwork again. Next I took the pieces and started to seam so that the purl sides and the beginnings of the rounds were facing each other. If you are not familiar how to make seams with Kitchener stitch check out this tutorial. The beginnings of the rounds do not have to match exactly but the neck shaping needs to be approximately at right place. In addition I recommend to place stitch marker for instance every 20th stitch so you can easily keep track on that there is as many stitches both on front and back needle. For some reason when I reached the end of my seam I noticed that I had 7 stitches more on the other needle and had to remake part of the seam.


4 Responses
This is amazing! Wish I had seen this article before trying to fix mine. I’ve sent you a message on Instagram, please, if you have time, help me. Thank you.
Wow that’s a really ingenius solution!
You may be saving me here! just got to the lower part of the body and realized I have this puffy yoke above the colour work- argh. Will try to do what you did! thanks
I really hope it works! Let me know if you have any problems.